Prepare Audio Tracks
Audio Requirements
The Teensy Audio Board ONLY recognizes one specific audio file format:
- WAV format
- 16 bit
- 44.1 KHz
Some recorders can be set to produce 16bit, 44.1kHz, WAV files. If not, then you will need to transcode your files using Media Encoder, Audacity, GarageBand or any other DAW you prefer. When you prepare your files, in addition to transcoding them you will want to edit, normalize and sweeten them.
Note: The Teensy manufacturer, PJRC, says that MP3 format will be supported soon. We will modify these instructions when that happens.
SD Card Requirements
As noted on the Material List, TactileAudio requires a specific class of micro SD card: SanDisk Ultra SDHC (or get from Amazon)
(Note: Many high-performance SD cards are optimized for video streaming, that is, for storing or retrieving a single file very quickly. The Teensy plays four tracks simultaneously, which requires "random access" performance rather than streaming performance, which the SanDisk microSD provides.)
File Naming: Single Tracks
When your tracks are ready, simply copy them to the micro-SD card you bought.
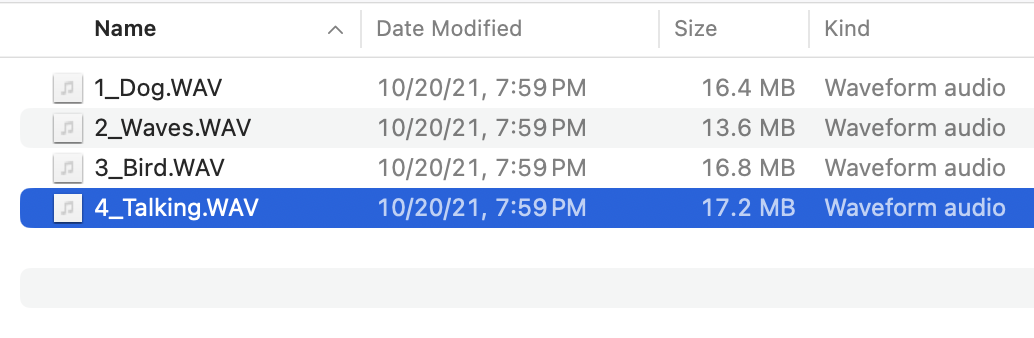
We recommend naming your tracks with numbers or letters to associate them with the channels (sensors) on your project. For example:
Prefix with numbers 1-4. This is simple and clear.
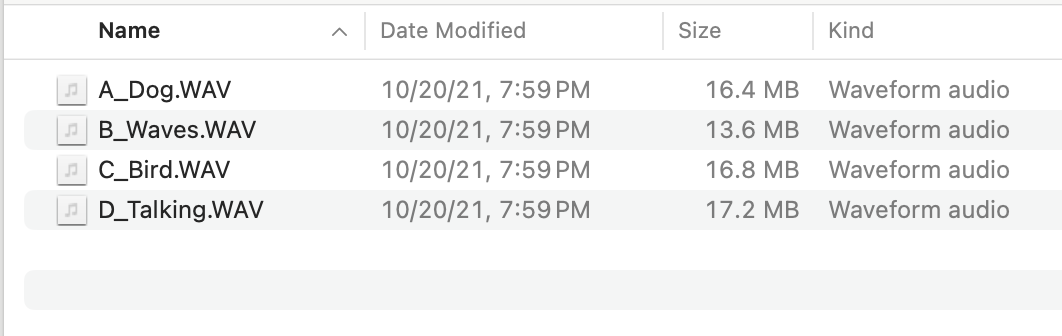
You can also use letters A, B, C, D.
(Here's more technical detail: The specific names don’t matter, but alphanumeric order does. The TactileAudio software scans your SD card, finds all the .WAV files, and sorts them into alphanumeric order. Once sorted, it assigns channels 1-4 to the first four .WAV files it found.)
File Naming: Random Tracks
The “play random track” option of TactileAudio system (which is described further in the software section, below) allows you to randomly select from up to 100 different tracks that can be assigned to a sensor. To use the random-track feature, create folders on the micro-SD card, one per sensor. They must be named E1, E2, E3, and E4. Each folder corresponds to one of the touch/proximity sensors.
A typical micro-SD card’s contents might look like this on a Macintosh:
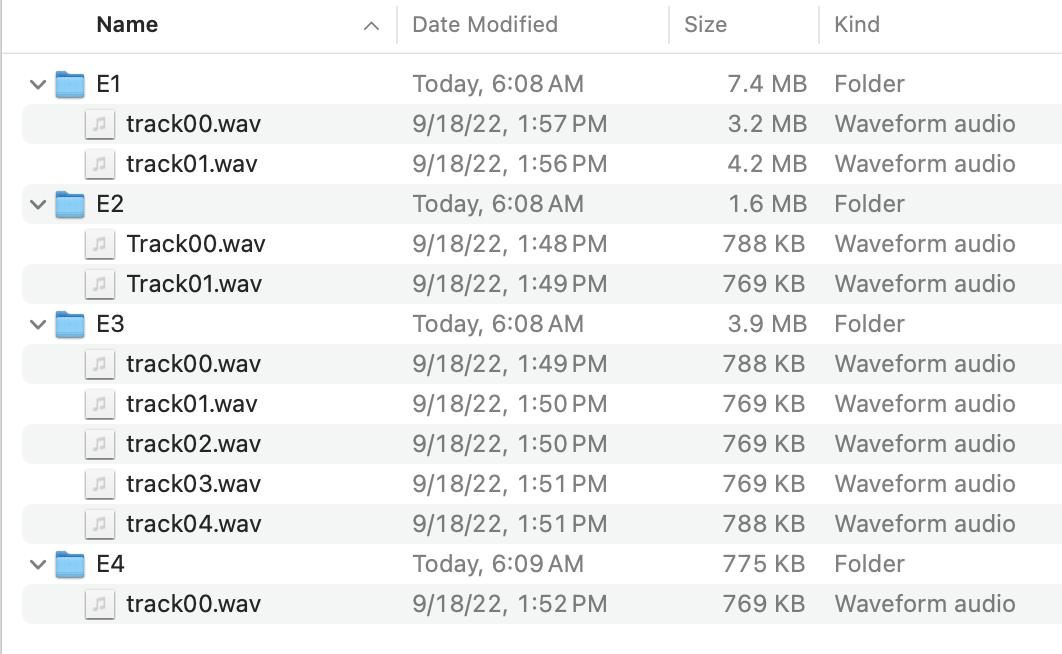
Note that while the folders must be named E1-E4, the names of the tracks inside each folder don’t matter (except that they must be .wav or .WAV). They’ll be played in random order regardless of names.
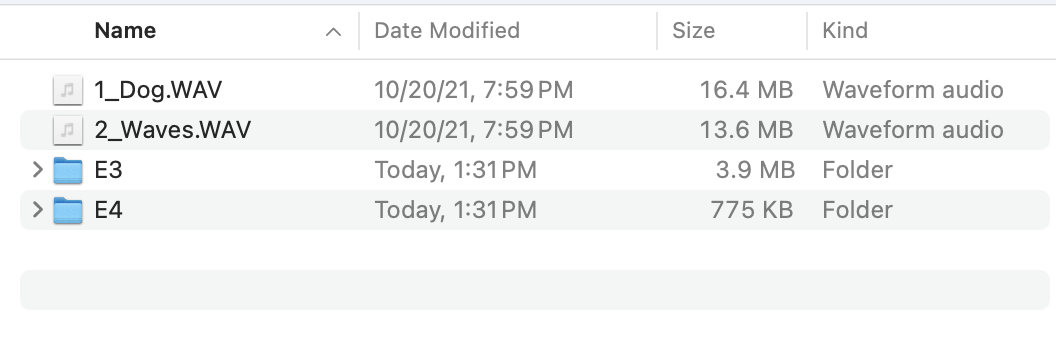
You can also mix random and single-track mode; that is, one channel (sensor) can play random tracks, and other channels play single tracks. For example, if you wanted to assign channels 1 and 2 a single track, and 3 and 4 to play random tracks, you SD card could look like this:
However, be aware that the single tracks still must be in alphabetical order, even if a track isn’t used. For example, if you want channels 1 and 3 to be a single track, and 2 and 4 to play random tracks, you might do this, but it won’t work correctly:
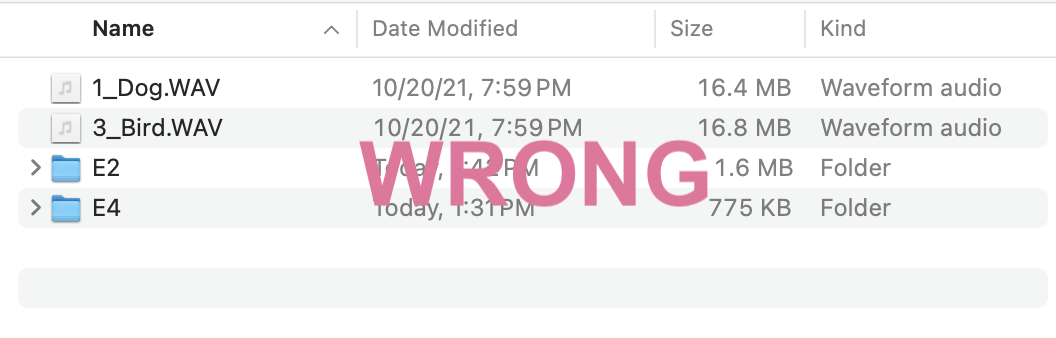
The problem is that the Dog-Bird tracks are the first and second tracks in alphabetical order, so will be assigned to sensors 1 and 2. To do this correctly, create a dummy file like this:
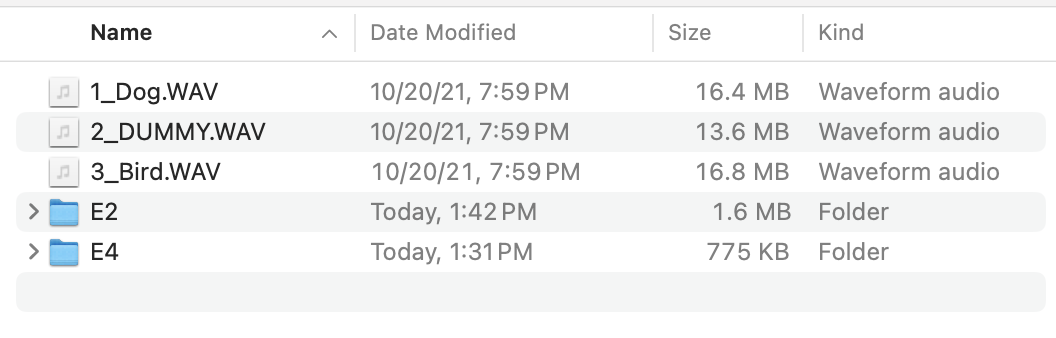
The dummy file won't be played (its contents don't matter), but it must be there as a placeholder and must have a .WAV suffix.
Installing the SD Card in your Teensy
When your micro-SD card is ready, insert it into the Teensy Audio board’s micro-card reader. (Note: there is also a second micro-SD reader on the Teensy 4.1 board; leave it empty, it’s not used.)
Once your micro-SD card is inserted, you need to restart the Teensy: either press the small white reset button on the Teensy, or else unplug the power and then plug it back in. When the Teensy restarts, it will re-read the SD card's contents.
If you install the micro-SD card in a powered-up Teensy, it won't re-read the contents.