OBSOLETE VERSION ... CLICK HERE for instructions for the newer hardware.
Only use these instructions if you have a PC board from the earlier version of the TactileAudio system.
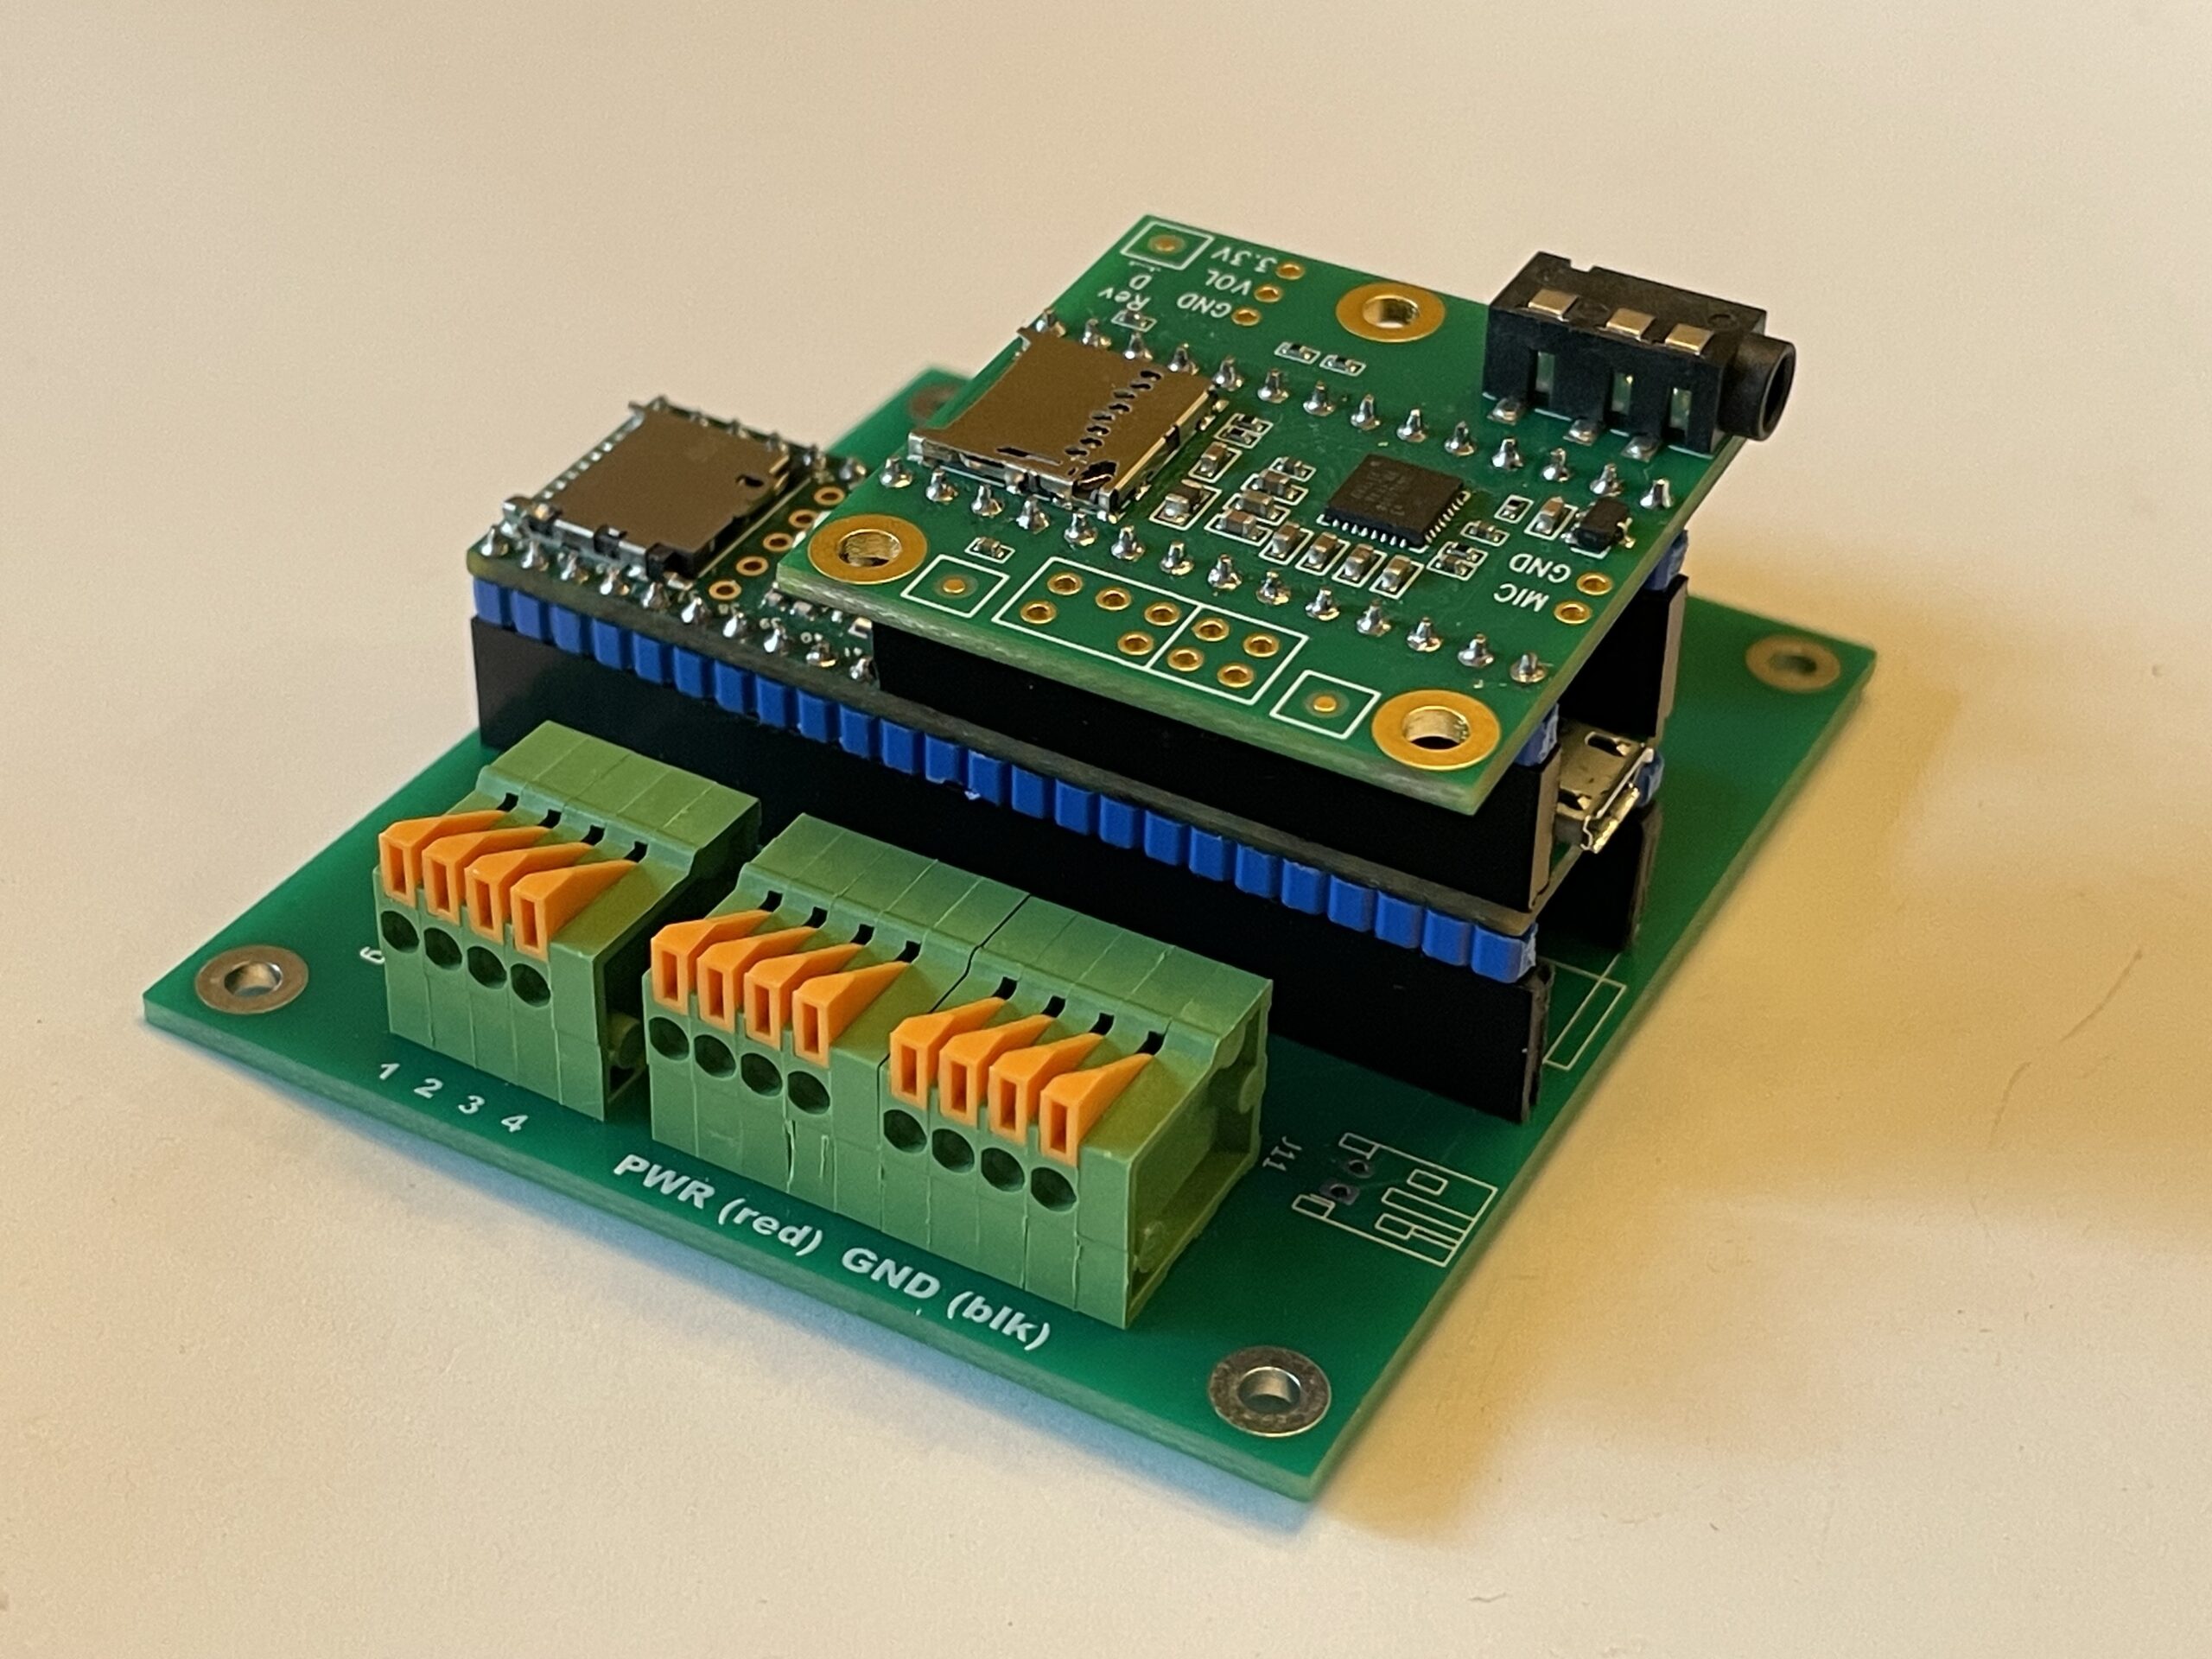
Assemble Teensy and Audio Board
The videos below will walk you through the assembly process, step-by-step. If you’re familiar with soldering and assembling electronics, you can probably put one together in about an hour to two. Those for whom electronics are a new experience should plan on a few hours to assemble their first one. We recommend getting a spare breadboard and some spare headers to practice soldering before you solder the real one.
Step 1: Add Header Sockets to the PC board
Step 2: Assemble Teensy
Add the header sockets and pins to the Teensy 4.1 microcontroller.
Step 3: Assemble the Audio Shield
Add header pins to the Teensy Audio Shield, and add a "key pin" to ensure it isn't installed backwards.
Step 4: Add the spring-terminal connectors
Reconfigure the spring-terminal blocks from 3-wide to 4-wide, then solder them to the PC board.
At this point, your TactileAudio project is ready for initial testing.
Initial Testing
When you’ve finished, it’s a good idea to test your assembled hardware. We’ll use a built-in example that comes with the Teensy board.
Plug the Teensy 4.1 (now installed on your PC board) back into your computer using the USB cable. Plug an audio device (e.g. headphones or speaker) directly into the Teensy’s audio card. It uses a stereo mini. It does not have built-in BlueTooth.
Open the Arduino IDE app, and select the following example:
File→Examples→Audio→Hardware Testing→Tone Sweep
Click on the ![]() button at the top left of the Arduino App. Once the sketch compiles and downloads, it will start doing a “tone sweep” up and down the audio spectrum that you can hear over your headphone or speaker. It may be a few seconds before you hear anything, as the tone sweep starts at very low (inaudible) frequencies.
button at the top left of the Arduino App. Once the sketch compiles and downloads, it will start doing a “tone sweep” up and down the audio spectrum that you can hear over your headphone or speaker. It may be a few seconds before you hear anything, as the tone sweep starts at very low (inaudible) frequencies.
Troubleshooting
If your assembled board isn’t working correctly (i.e. you hear no sound when running the initial test), it can be tricky to figure out why.
The most likely causes are:
- Your audio device (earbuds, headphones, speakers, etc.) aren’t working. Double check with something else (e.g. a different set of headphones or earpods) that the audio device produces sound.
- Incorrect assembly – you got some of the parts soldered together in the wrong configuration. Double check the video and the example photographs. A single mis-wired component can make it not work.
- Bad solder joints, also known as “cold solder joint,” or a spot that you missed altogether. Sometimes the solder doesn’t get hot enough to fuse to the metal properly. You can “re-flow” the solder by heating each soldered pin again with the soldering iron, and (if it looks “dry”) apply a tiny amount more solder.
- Defective parts. Very occasionally, parts are just defective; e.g. your Teensy 4.1 microcontroller might work but the Teensy Audio board has a problem. The only way to definitely diagnose this is if you have two Teensys and two audio boards; switching them around will identify a bad component.