OBSOLETE VERSION ... CLICK HERE for instructions for the newer hardware.
Only use these instructions if you have a PC board from the earlier version of the TactileAudio system.
Preparing the Gemma-M0
Updating and Programming
The Gemma-M0 “Miniature Wearable Electronic Platform” is a tiny general-purpose microcontroller. In this step, we'll install a program that makes it a touch/proximity sensitive “amplifier” that senses when your hand (or other capacitive object) moves near a touch sensor (conductive thread, foil, metal strip, etc.).
Once programmed, it will retain the program as you solder its wires and connect it to the Teensy.
If you prefer written instructions:
1. IMPORTANT! Disconnect the wires (if connected) between the Gemma M0 and the Teensy 4.x board, even if the Teensy 4.x board isn’t plugged in.
2. Plug in the Gemma M0 to your computer with a USB cable. A new disk
drive icon called CIRCUITPY will appear on your computer.
3. Press the RESET button twice (small black button, not the slider switch) on the Gemma M0 board. If this works, the RGB status LED(s) on the board will flash red and then stay green. The CIRCUITPY drive will disappear, and a new drive called GEMMABOOT will be mounted. (You may not see it right away; see step 4.) If the LED doesn’t stay green, try again; you have to get the timing right between the two button clicks. You will get a “Disk Not Ejected Properly” error — ignore it.
4. Find the new drive, called GEMMABOOT. Sometimes it doesn’t appear on your desktop; if this happens, go to the “top” of your file system (in Finder, select File–>Go–>Computer, and look for GEMMABOOT). Open the GEMMABOOT drive.
5. Find the .uf2 file in the same directory where you found these instructions, for example:
Documents/Arduino/hardware/gemma-m0/adafruit-circuitpython-gemma_m0-en_US-7.3.3.uf2
(You may have downloaded a later version). Drag that file into the GEMMABOOT folder. The Gemma-M0 will immediately install the new version and reboot.
6. The GEMMABOOT disk will disappear, and the CIRCUITPY disk icon should reappear on your desktop. (You may get another “Disk Not Ejected Properly” error — ignore it.)
7. Drag the file code.py in this directory into the CIRCUITPY directory. If it asks about a duplicate filename, select “Replace” to overwrite the existing code.py file. The Gemma-M0’s LED should blink a few times, then go off.
8. Eject the CIRCUITPY disk (drag it to the trash).
9. To test the Gemma-M0, touch the electrode contact labelled A1, just to the left of the USB cable. The red light should flicker dimly when you’re near the A1 electrode, and brightly if you touch the A1 electrode firmly.
10. All done — you can unplug the Gemma-M0 from the USB. It is ready to use as a proximity/touch detector.
Testing
Optional: When you’ve finished programming the Gemma-M0, you can test that it’s working with a voltmeter (if you have one). Even if you don’t have a voltmeter, you might watch the video below to get an idea how the Gemma-M0 works for us.
Here is more information about the Gemma-M0 from AdaFruit, the manufacturer:
Wiring the Gemma-M0 to the Teensy Board
Add the wires to the Gemma-M0 (which will connect it to the Teensy); the wiring is illustrated in this video:
When you finish, it should look like this:
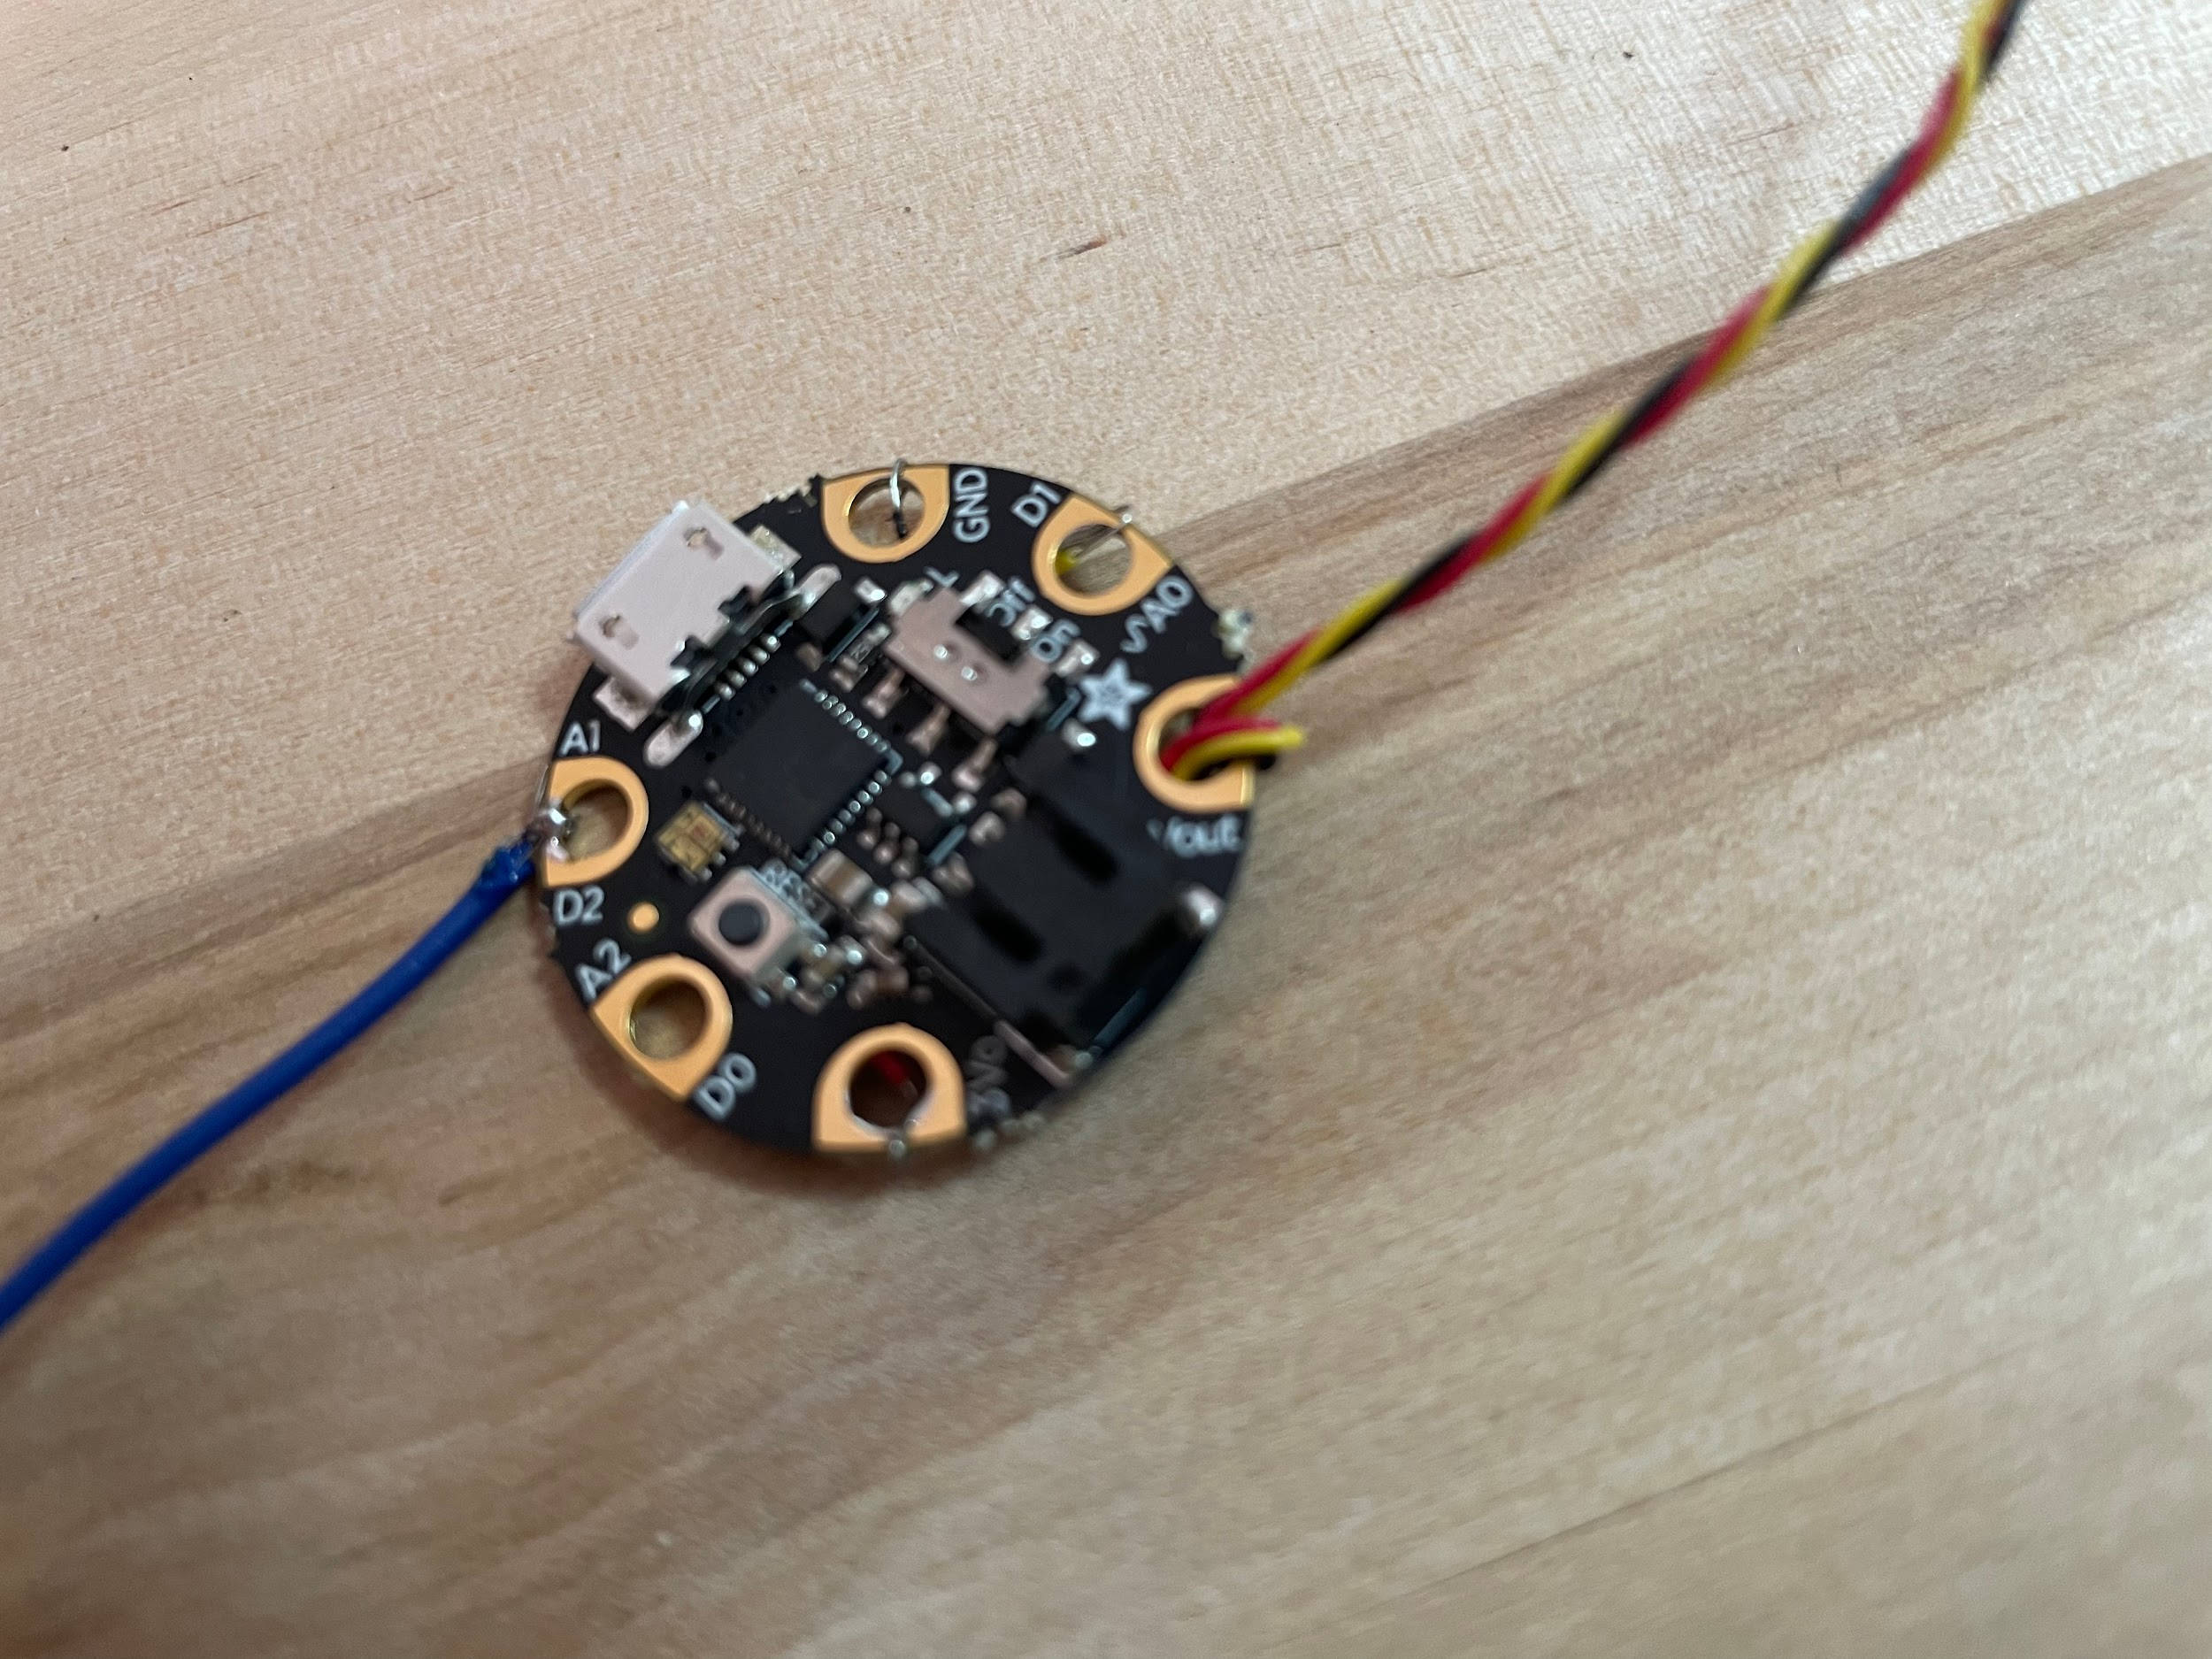
Next, connect the Gemma-M0’s wires to the Teensy board as shown here:
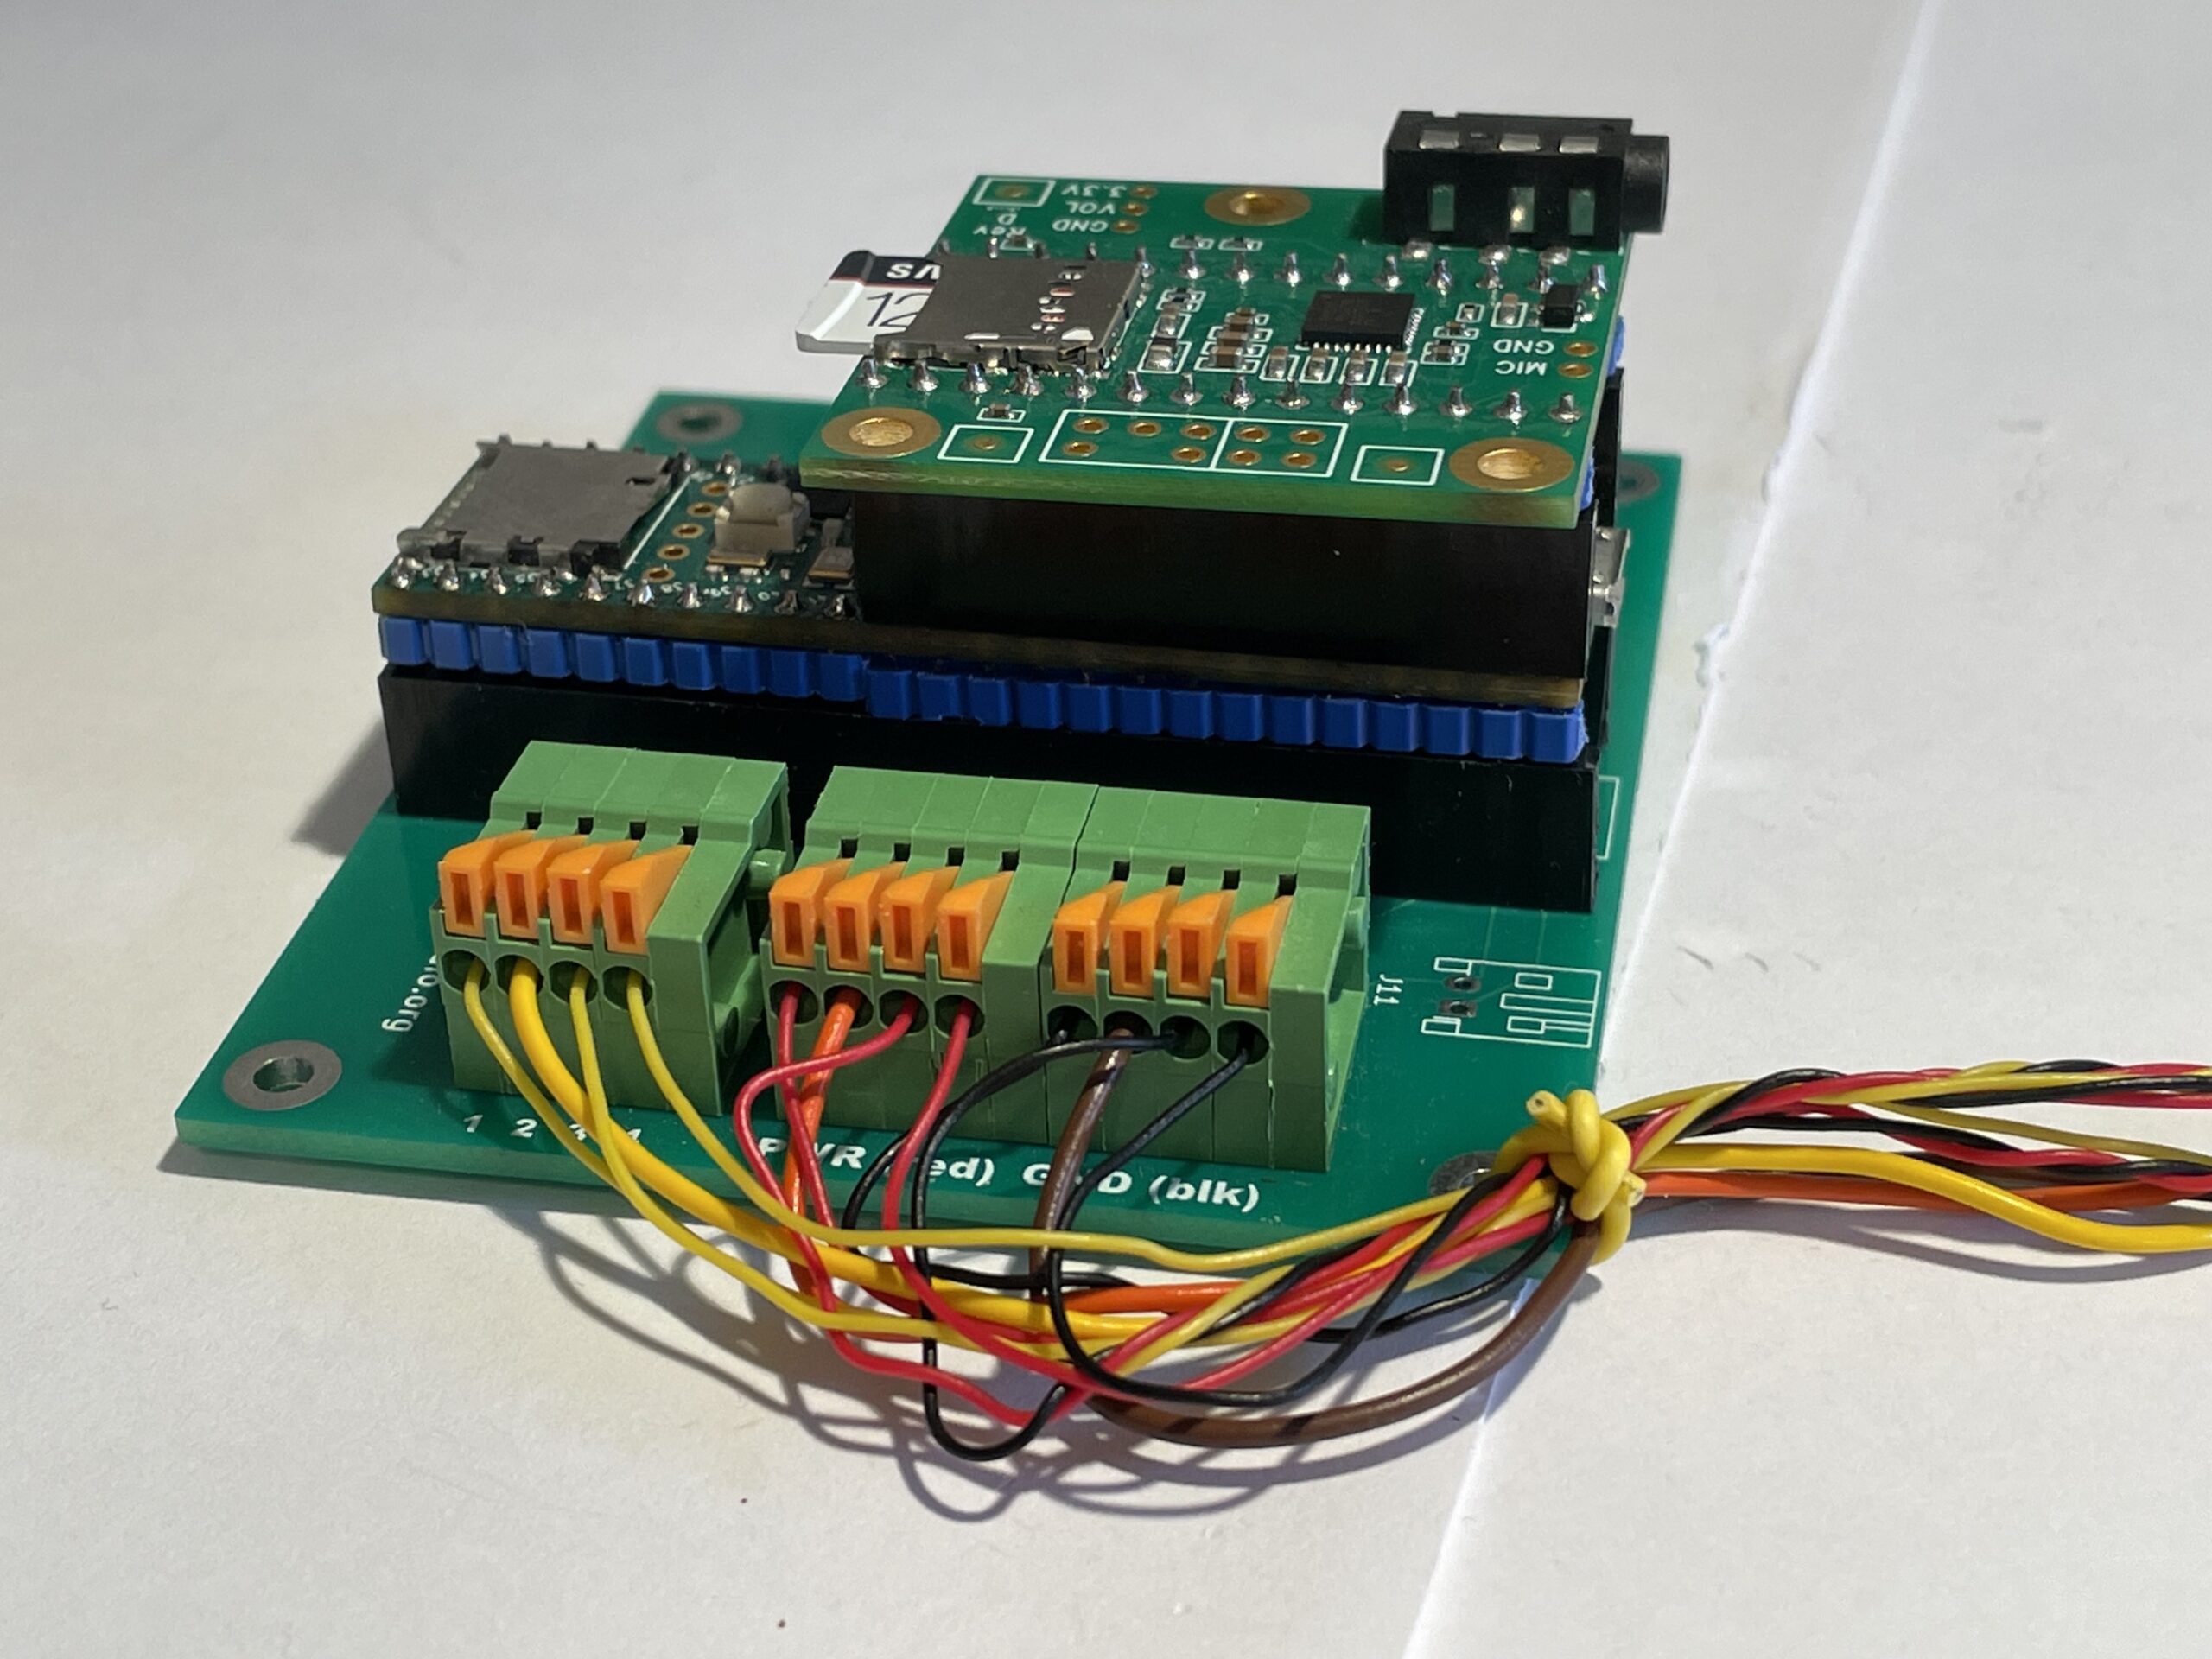
Be sure you get the red and black wires to the correct connector block! The PC board is clearly marked with "red" and "black". Reversing them will send voltage backwards through the Gemma-M0 and will probably damage or destroy it.
The yellow wires’ order is important: the first position (leftmost in the photo above) will be sensor 1 (associated with the first track on your micro-SD card), and the last one will be sensor 4 (associated with the fourth track on your micro-SD card). (See the chapter Prepare Audio Tracks for more information about SD card file names.)
Also notice how in the photo above the wires are bundled and tied firmly to the PC board (the yellow wire wrapped around the bundle). This provides strain relief so that ordinary handling of your Teensy system doesn’t break the wires or pull them from the connectors.