OBSOLETE VERSION ... CLICK HERE for instructions for the newer hardware.
Only use these instructions if you have a PC board from the earlier version of the TactileAudio system.
Install Arduino and TactileAudio Library
Before you start soldering your Teensy components together, it’s a good idea to get the Arduino software installed on your computer and learn how to use it. This also lets you check that your Teensy 4.x microcontroller is working correctly before you start soldering on it.
Install TactileAudio Libraries
Step 1: Install the TactileAudio software “libraries” and examples.This is our custom software and library that interfaces with the Arduino sketch we provide:
- Download the TactileAudio software “libraries”. Click the link below, then download the latest ZIP file (earlier ZIP files may be available too; for new users, use the latest):
TactileAudio software releases
- Move the ZIP file you downloaded (for example, Arduino-2023-12-06.zip) to your Documents folder (or other you create for this project).
- Uncompress the ZIP file. You can usually do this by double-clicking the ZIP file. This will create a folder called “Arduino” in your Documents directory (or whatever folder you set up).
Your Documents/Arduino folder should now contain these sub-folders:
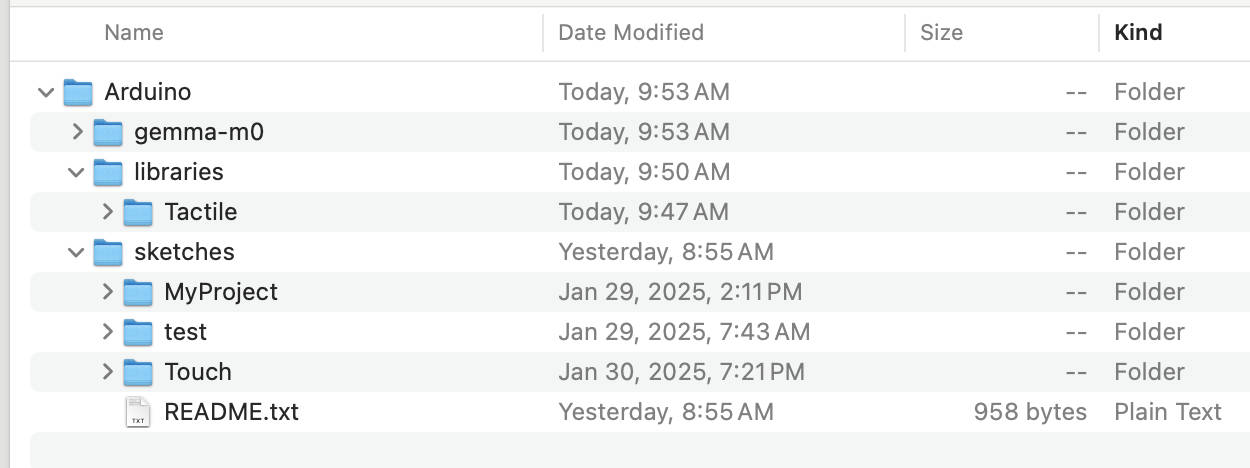
Inside of the “‘sketches” folder there is a folder “Touch” which has the Touch.ino sketch. Inside the “MyProject” folder is a copy of the Touch.ino that you can work on, leaving the original unchanged in case you need to get back to the beginning. As you proceed, you will add additional sketches for different inputs and different outputs (sound and active haptics).
Install the Arduino App
Step 2: Download the Arduino App: The Arduino IDE 2 tutorial page explains how to download, install, and use the Arduino IDE app. (An "IDE" is the “Integrated Development Environment” that programmers use to develop, debug, and install software.) Note: You will not be writing computer programs; you'll only use the IDE to transmit your sketches to your project.
Step 3: Tell Arduino where your project folder is: start the Arduino app, open the Settings panel (Arduino-->Settings menu). then click on the "Browse" button. Navigate to your "Arduino" folder (that you created in Step 1 above), and select it.

Add Teensy Support
Step 4: Add the Teensy board “plug in” so that Arduino can find and program your Teensy 4.x board:
- Start the Arduino IDE app, then click Arduino IDE –> Settings
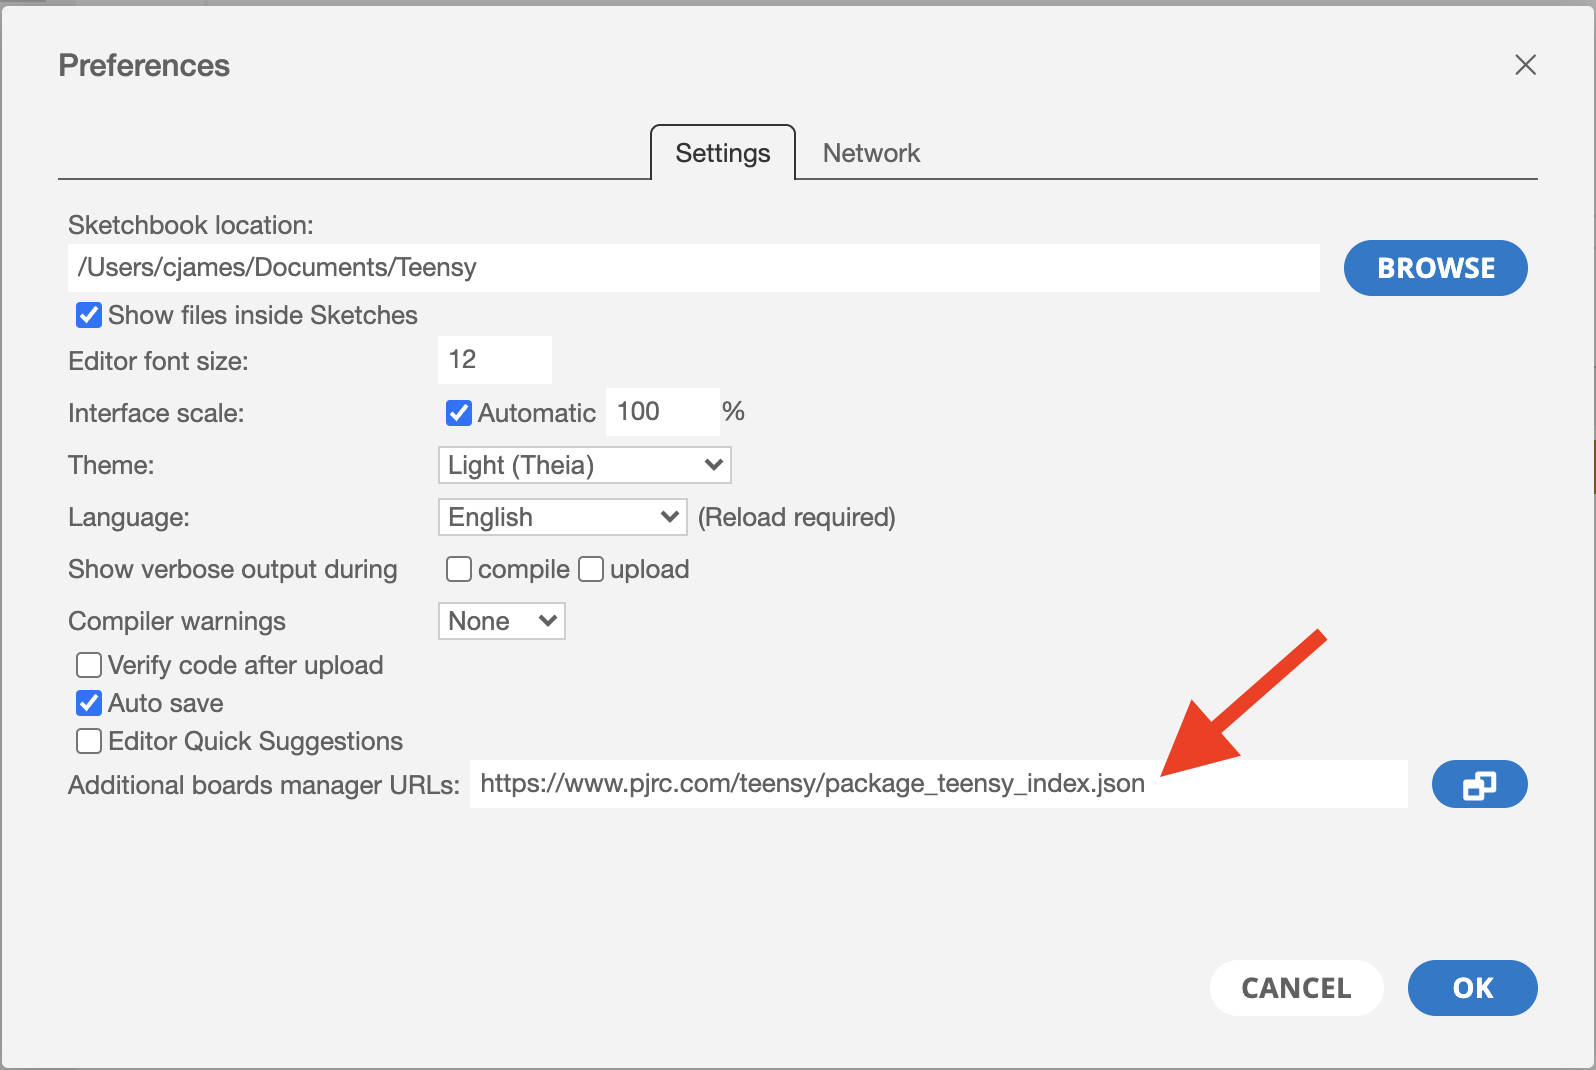
- Copy this link (see snapshot below):
https://www.pjrc.com/teensy/package_teensy_index.json - Paste the link into the “Additional boards manager URLs” field at the bottom of the window. Click "OK".
- Wait while the Arduino software updates itself. It takes a few minutes. Quit and restart the Arduino app.
Test Arduino
Step 5: Take your Teensy 4.x out of the packaging. Using a USB cable (one end standard, the other end a micro-USB), plug the Teensy 4.x board into your computer. The LEDs on the Teensy will blink a few times as it powers up.
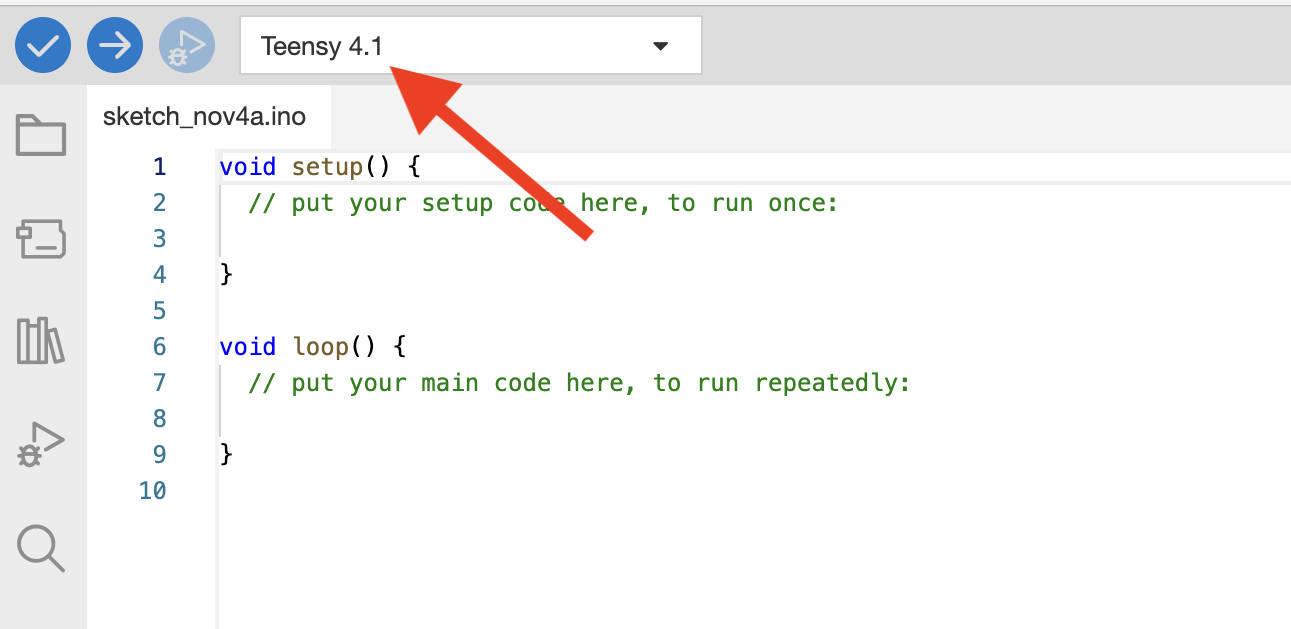
Step 6: Set the Arduino software to recognize the the Teensy 4.1 board. Open Arduino, if not already open, and at the top select the Teensy 4.1 board; see illustration below. (The Arduino IDE is capable of programming many different microcontrollers; this will to tell it to find yours.) Sometimes Arduino does not find the board in this top field. If it doesn't show "Teensy 4.1" as one of the choices, go to the left of the window and click on the second icon down. This will give you a list of boards. You can type in “Teensy” to select it.
Step 7: Test that everything is working: start the Arduino supplied example “sketch” called “Blink”:
- Click File→Examples→01.Basics→Blink. A new window will open.
- Click on the
 button (“Compile and Upload”) in the top-left of the Arduino window.
It will take a few moments to compile the program and download it to your Teensy board. When it finishes, the LED on the Teensy will start blinking. If it is not connecting to the board properly, you will get a compilation error message in the bottom of the Arduino window. Sometimes you will need to reset the Teensy by pressing a white button on the Teensy.